
Saturday, April 30, 2011
P.S. Easter!
Easter is my favorite holiday so I just had to celebrate it a little bit more. Somehow, the Easter Bunny still manages to find me every year. This year, he not only brought me a done kitchen but also this amazing Easter "basket":
 Yes, that's a cake dome filled with Easter grass, delicious chocolates and a mini bottle of pink champagne. The item in front is a hori-hori (or Japanese weeding knife) that somehow has a bunny printed on the holster! Way to go Easter Bunny, you made my month!
Wednesday, April 27, 2011
The Almost-there Kitchen
In my experience, renovation projects strongly resemble marathons. You think it's a great idea! You get ready! You take off strong! No problems! You run the first half. You work through the tough moments. You think "I can totally do this. Hard, but doable!" You hit mile 20. You think "what the hale was I thinking??" You quickly go to "can I stop now? No, I'm so close!" Which quickly turns into "OMG, what the HALE was I thinking? Slap me if I ever want to do this again." You slowly lurch over the finish line and lay in a heap panting. Once your legs have recovered you celebrate and you sleep in equal measures. Two months later, the pain is forgotten and it seems like a GREAT idea again.
Yeah, ok, I've never run a marathon, but at least that is exactly what renovation feels like. We're currently at something like mile 24. Accomplishments to date: new countertops, new sink and PAINTED cabinets! (This last one is a miracle of truly epic proportions.) Accomplishments to go: painting the walls, fixing and painting the trim. I wanted to wait to write this post until we had flopped over the finish line, but it looks like we're going to be hobbling along for a bit, so I figured I should celebrate our accomplishments so far.
Check it out, our "new" kitchen!


 OK, the cabinets don't look that much different in my terrible night photography but it really does look better, you'll just have to believe me. Yay for new counter and washing cake plates in the sink is no longer an exercise resembling yoga. I'm so happy!
We're still crawling towards the finish line. The window trim in this kitchen is a disaster. We have succeeded in picking out a paint color ("Porcelain Skin" by Behr, a light warm apricot/peach color, all the yellows we debated looked too eggy with the wood beadboard), but the time to tape and paint has not arrived. I have a full week planned next week and then I'm going on a two-week vacation to Croatia so it may just have to wait till the end of May! Ugh. Again, limping sloooowly towards that elusive finish line, but we'll get there. Meanwhile, I'm gonna go wash something. :)
Yeah, ok, I've never run a marathon, but at least that is exactly what renovation feels like. We're currently at something like mile 24. Accomplishments to date: new countertops, new sink and PAINTED cabinets! (This last one is a miracle of truly epic proportions.) Accomplishments to go: painting the walls, fixing and painting the trim. I wanted to wait to write this post until we had flopped over the finish line, but it looks like we're going to be hobbling along for a bit, so I figured I should celebrate our accomplishments so far.
Check it out, our "new" kitchen!

Yee haw! OK, the knobs are still hideous, but we're working on it. Check out that beauteous countertop and the gigundas sink! As I'm fond of saying, you could wash a turkey or a two-year-old in it.
Full confession, I really failed on my portion of this renovation. The manfriend was going to do the scary carpentry/plumbing/countertop shaping and I was going to do the painting. How hard can it be, right? Yeeeeah, if you saw my last post, you know that it was not a cakewalk. After my fourth attempt, my far more anal-retentive marital partner took over and started from scratch. In two very light and very careful coats, he turned out passable cabinets. I made Easter brunch. Whatever, when in doubt, play to your skills. (Because he knows how important Easter brunch is to me, that exemplary piece of manflesh stayed up all night on Easter eve painting and putting the kitchen back together so there would be a finished kitchen when the guests arrived. That, my friends, is true love.)
OK, so you've heard about the process of painting the cabinets. In a less nightmarish vein, the zinc counters were surprisingly easy to install. First we bought the zinc from rotometals.com ($200 for the whole kitchen's worth, woot!) It comes in a big roll. We laid it out to loosen any set and tried to get it as flat as possible. As previously covered, the husband made a support for the sink and put a bullnose edge on the front of the counter. We measured out how big the countertop pieces should be including the backsplash, cut the sheet with shears, and bent the backsplash into shape with a piece of wood and a hammer. (Had we used a plastic mallet, we would have done better, small hammer marks can be seen in the backsplash, but it just adds character, right?) We wrestled the zinc sheet into the kitchen, set it on the floor, laid a thick layer of construction adhesive down on the counter (I got to use the adhesive gun, super fun,) squeegeed the adhesive out flat, put the countertop on and sat on it till it adhered. Just kidding, we weighted it down with buckets of water and cinder blocks. After curing overnight, we (ok, really the handy husband) bent over the bullnose in the front, secured it with galvanized nails and we called it a game! We repeated this process with the end piece on the far side of the stove, and on the short L next to the fridge and we were done. Truly, that part of the renovation was easy as pie. We had some hiccups, in one spot the adhesive wasn't thick enough and the counter didn't adhere all the way (you can "pop" it in and out.) But overall, I think they turned out awesome and they're already developing patina. We didn't do anything to finish them, in a couple weeks we might do a light sand and a coat of beeswax to try and get the patina a little more even. I think it looks especially good with the white sink:

Beauteous! Shall we do a before and after? Oh let's do.


We're still crawling towards the finish line. The window trim in this kitchen is a disaster. We have succeeded in picking out a paint color ("Porcelain Skin" by Behr, a light warm apricot/peach color, all the yellows we debated looked too eggy with the wood beadboard), but the time to tape and paint has not arrived. I have a full week planned next week and then I'm going on a two-week vacation to Croatia so it may just have to wait till the end of May! Ugh. Again, limping sloooowly towards that elusive finish line, but we'll get there. Meanwhile, I'm gonna go wash something. :)
Saturday, April 23, 2011
Cabinets - the Bane of Our Existence
OK, we're midway through the kitchen refresh, which (of course,) was supposed to be done three days ago. The moral of the week: painting cabinets is hard. Really hard.

Our story opens a week ago, with the beginning of this project. My husband, being the construction expert that he is, is in charge of countertop creation and sink installation. I am in charge of painting. Swell. The cabinets were previously grey, but they were beat up and I was worried that the grey would clash with the counters. Besides, everyone likes a crisp white cabinet, right? No problem.
In typical me fashion, I read everything the interwebs had to say on the subject before I started. Everyone seems to have a different opinion on exactly how to do it, but everyone is unanimous in stating that prepping the surfaces is the hard part. And the important part. Once you're there, getting the paint on should be no big deal. Right? Right?!? SO not right...
So last weekend, like a good child, I take the cabinet doors off of the cabinets. I remove every last bit of hardware. I start sanding. I sand and sand and sand until the doors are perfectly smooth and uniform. I am SO ready for painting. This Old House has stated unequivocally that a high-quality bristle brush is the only way to apply paint to cabinets. And that oil paint might be better but a high quality latex would be fine too. OK! Got it! I procure the highest quality paint money can buy and I get a very nice bristle brush. I swipe on my first coat. Hmmmm, you can see brush marks. Highly visible brush marks. 'Well,' I think 'maybe a second coat would help!" Second coat is more streaky than the first. My paint-savvy friend Anna comes over and assesses the cabinets. She gives her head a sad but definitive little shake. "You're going to have to sand these down to get those marks out..." she says.
The husband says "oh yeah, I knew a bristle brush wasn't going to work, you need to use a foam brush!" Augh. OK, back to the hardware store. Foam brushes! Yay! Sand the cabinets down again. My friend Christyne comes over to help me be extra-anal retentive. With the Styne-Tine-Steam-Dream-Team reformed, we start to paint the cabinets. Ummmm...brush strokes are still present although not as heinous as the bristle brush ones. Hmmm. Maybe another coat will help!!
Negatory, Will Robinson. Streaks still present. I go to Home Depot and throw myself on the Home Depot guy's mercy. He says oh yes, a foam brush is not the thing, what you need is a cabinet roller! Oh goody! I lope on home with my little roller. I gleefully roll what I am sure is the last coat of paint on the cabinets. Stipple marks. I get stipple marks. I think they are less noticeable than the brush strokes? Maybe?
I present the situation to the husband. He looks at me like one might look at a cobra poised to strike and says "um..I think I liked the foam brush streaks better?" Hissssssss. He promptly volunteers to do the last coat of paint himself, to save me from insanity and him from flayed limbs. My father takes pity on us and sands down the cabinets for (hopefully) the last time while he's in town. The husband's final coat of gray isn't on yet, so I can't qualify this as a success just yet, but it's in progress.
The lesson of the week: cabinets are HARD. Attempt at risk of your own sanity!


(Teaser shot of the new countertops and sink, with a glimpse of the cursed cabinetry.)
In typical me fashion, I read everything the interwebs had to say on the subject before I started. Everyone seems to have a different opinion on exactly how to do it, but everyone is unanimous in stating that prepping the surfaces is the hard part. And the important part. Once you're there, getting the paint on should be no big deal. Right? Right?!? SO not right...
So last weekend, like a good child, I take the cabinet doors off of the cabinets. I remove every last bit of hardware. I start sanding. I sand and sand and sand until the doors are perfectly smooth and uniform. I am SO ready for painting. This Old House has stated unequivocally that a high-quality bristle brush is the only way to apply paint to cabinets. And that oil paint might be better but a high quality latex would be fine too. OK! Got it! I procure the highest quality paint money can buy and I get a very nice bristle brush. I swipe on my first coat. Hmmmm, you can see brush marks. Highly visible brush marks. 'Well,' I think 'maybe a second coat would help!" Second coat is more streaky than the first. My paint-savvy friend Anna comes over and assesses the cabinets. She gives her head a sad but definitive little shake. "You're going to have to sand these down to get those marks out..." she says.
The husband says "oh yeah, I knew a bristle brush wasn't going to work, you need to use a foam brush!" Augh. OK, back to the hardware store. Foam brushes! Yay! Sand the cabinets down again. My friend Christyne comes over to help me be extra-anal retentive. With the Styne-Tine-Steam-Dream-Team reformed, we start to paint the cabinets. Ummmm...brush strokes are still present although not as heinous as the bristle brush ones. Hmmm. Maybe another coat will help!!
Negatory, Will Robinson. Streaks still present. I go to Home Depot and throw myself on the Home Depot guy's mercy. He says oh yes, a foam brush is not the thing, what you need is a cabinet roller! Oh goody! I lope on home with my little roller. I gleefully roll what I am sure is the last coat of paint on the cabinets. Stipple marks. I get stipple marks. I think they are less noticeable than the brush strokes? Maybe?
I present the situation to the husband. He looks at me like one might look at a cobra poised to strike and says "um..I think I liked the foam brush streaks better?" Hissssssss. He promptly volunteers to do the last coat of paint himself, to save me from insanity and him from flayed limbs. My father takes pity on us and sands down the cabinets for (hopefully) the last time while he's in town. The husband's final coat of gray isn't on yet, so I can't qualify this as a success just yet, but it's in progress.
The lesson of the week: cabinets are HARD. Attempt at risk of your own sanity!

(Oh cabinets, how I loathe you...)
Saturday, April 16, 2011
The "Before" Kitchen
What is the current state of our home? In the immortal words of Bill Murray in Ghostbusters: "Dogs and cats living together, mass hysteria!" We are doing what I've been calling a "light kitchen refresh". So far there hasn't been anything light or refreshing about this job. But it does sound so much more pleasant than "doing an insane amount of work just to get some freshly painted cabinets and a new countertop." Right? However, it's going to be great when its done and we're jumping in with both feet.
The plan is new countertop, newly painted cabinets, new wall color, and new sink. The countertop plan is to cover our existing forest green laminate counter (1992 called, it wants it's countertop back,) in zinc sheet. Zinc is the material of every single bartop in France, it is naturally anti-bacterial and it develops a dark grey patina over time. Think 1920's speakeasy style. It is also extremely cheap (think $150 for the whole kitchen) and can go down right on top of existing countertops, making it a super low barrier-to-entry choice for people who don't want to replace the whole shebang. We're hoping it will look super cute and retro, especially when paired with our new/old white farmhouse sink from the Restore! For the bargain price of $30, we picked up a cast iron vintage sink. It isn't apron-front, but it does have one single enormous bowl, which I am looking forward to. I could wash a whole turkey in there. (Turkeys, look out!) Check it:
 The kitchen cabinets have been looking a little dingy for quite a while now, and they were a grey color that we felt like would clash with the grey metal of the counters, so we're painting those white. The walls are also going to be painted, a color which is so far TBD.
SO, the overall kitchen before looked like this:
 The cabinets/counters looked like this:


The plan is new countertop, newly painted cabinets, new wall color, and new sink. The countertop plan is to cover our existing forest green laminate counter (1992 called, it wants it's countertop back,) in zinc sheet. Zinc is the material of every single bartop in France, it is naturally anti-bacterial and it develops a dark grey patina over time. Think 1920's speakeasy style. It is also extremely cheap (think $150 for the whole kitchen) and can go down right on top of existing countertops, making it a super low barrier-to-entry choice for people who don't want to replace the whole shebang. We're hoping it will look super cute and retro, especially when paired with our new/old white farmhouse sink from the Restore! For the bargain price of $30, we picked up a cast iron vintage sink. It isn't apron-front, but it does have one single enormous bowl, which I am looking forward to. I could wash a whole turkey in there. (Turkeys, look out!) Check it:

SO, the overall kitchen before looked like this:


Hey forest green, heeey.

The most often asked question is "is the beadboard staying?" Yes, Virginia, the beadboard is staying. I don't love it, (or at least would paint it white) but my husband is a woodworker and he's really attached to it. What can I say, marriage is about compromise. I figure I'll focus my laser-beam-of-death on the forest green counters for now and worry about the beadboard later.
Last weekend we started tearing stuff up. The old sink came out (yippee!) and we made supports for the new one. The "during" shot looks something like this:

We also prepped the counter for the zinc, which required a (very frustrating) amount of puttying, and the husband neatly added a half-round so the countertop will have a retro bullnose edge rather than a modern-looking square edge. The bullnose looked like this:

This required yet more puttying and sanding. OMG, puttyandsandputtyandsandputtyandsand. This cycle rolls on and on. And on.
OK, so this week we got the zinc cut and bent. Today, the progress looks like this!

Zinc cut and laid, and sink hole cut! The sink is just dropped in there for the moment, it isn't caulked or bedded in. (Check out all my new profesh lingo! Apparently when you seat something in putty it's called "bedding" it. Kinky.) But doesn't it already look better? All right, just to keep it real, the rest of the kitchen looks like this:

Not all is sunshine and roses. But progress IS happening. The painting of the cabinets is all my job (while the hubs is off doing plumbing and counters and other things.) Problem is, I'm not super Type-A. I'm trying hard, I spent several hours sanding everything nicely, but this morning's painting resulted in streaks from the brush. The brush that This Old House recommended as the only way to paint cabinets. I think they are full of it. I think maybe a smooth roller or sponge brush might be the way to go. My friend Miss Anna stopped by and rendered her professional opinion which was that my only recourse would be to wait till the current doors and drawers are dry, then do a light sand and then a final smooth coat with something-that-is-not-a-brush. So currently the cabinet doors and drawers are drying:

With hopes for a better tomorrow. Fingers crossed! Meanwhile, the renovation truck slowly lumbers on, Easter is next week so I'm hoping to put the Humpty Dumpty of our kitchen back together by then! Send me good vibes, people, I think we might need them.
Wednesday, April 13, 2011
My Secret Shame - the Yard "Before" Pics
OK, people, my last post was abnormally chipper, to make up for this post, which is a skotche of a downer. Well, not a downer so much as a as-much-as-I-try-hard-to-be-perky-on-the-interwebs-this-house-is-still-in-progress post. Welcome to my secret shame (dun dun DUN.) However, great "after" pictures are so much more satisfying with a good wow-that-is-terrible "before" session, don't you think? So, this is the story of the yard "before".
One of the reasons I agreed to move into my husband's house was the enormous yard. This house sits on a double lot which means by Seattle standards, we have a biiiig yard. When I moved in, the yard was extremely overgrown due to a long summer of getting married shenanigans and being away. Last October, we hired some guys to spend allll day hacking everything out of the yard and reclaiming the yard space. It was a big job and they did great. Unfortunately, if there's something that I am worse at than cooking, its gardening. The beds are now bare, ready for something great. Which...has yet to happen. So, daffodils are blooming and spring is going crazy everywhere but here:


 (With my baby in the background, hi Beetle!)
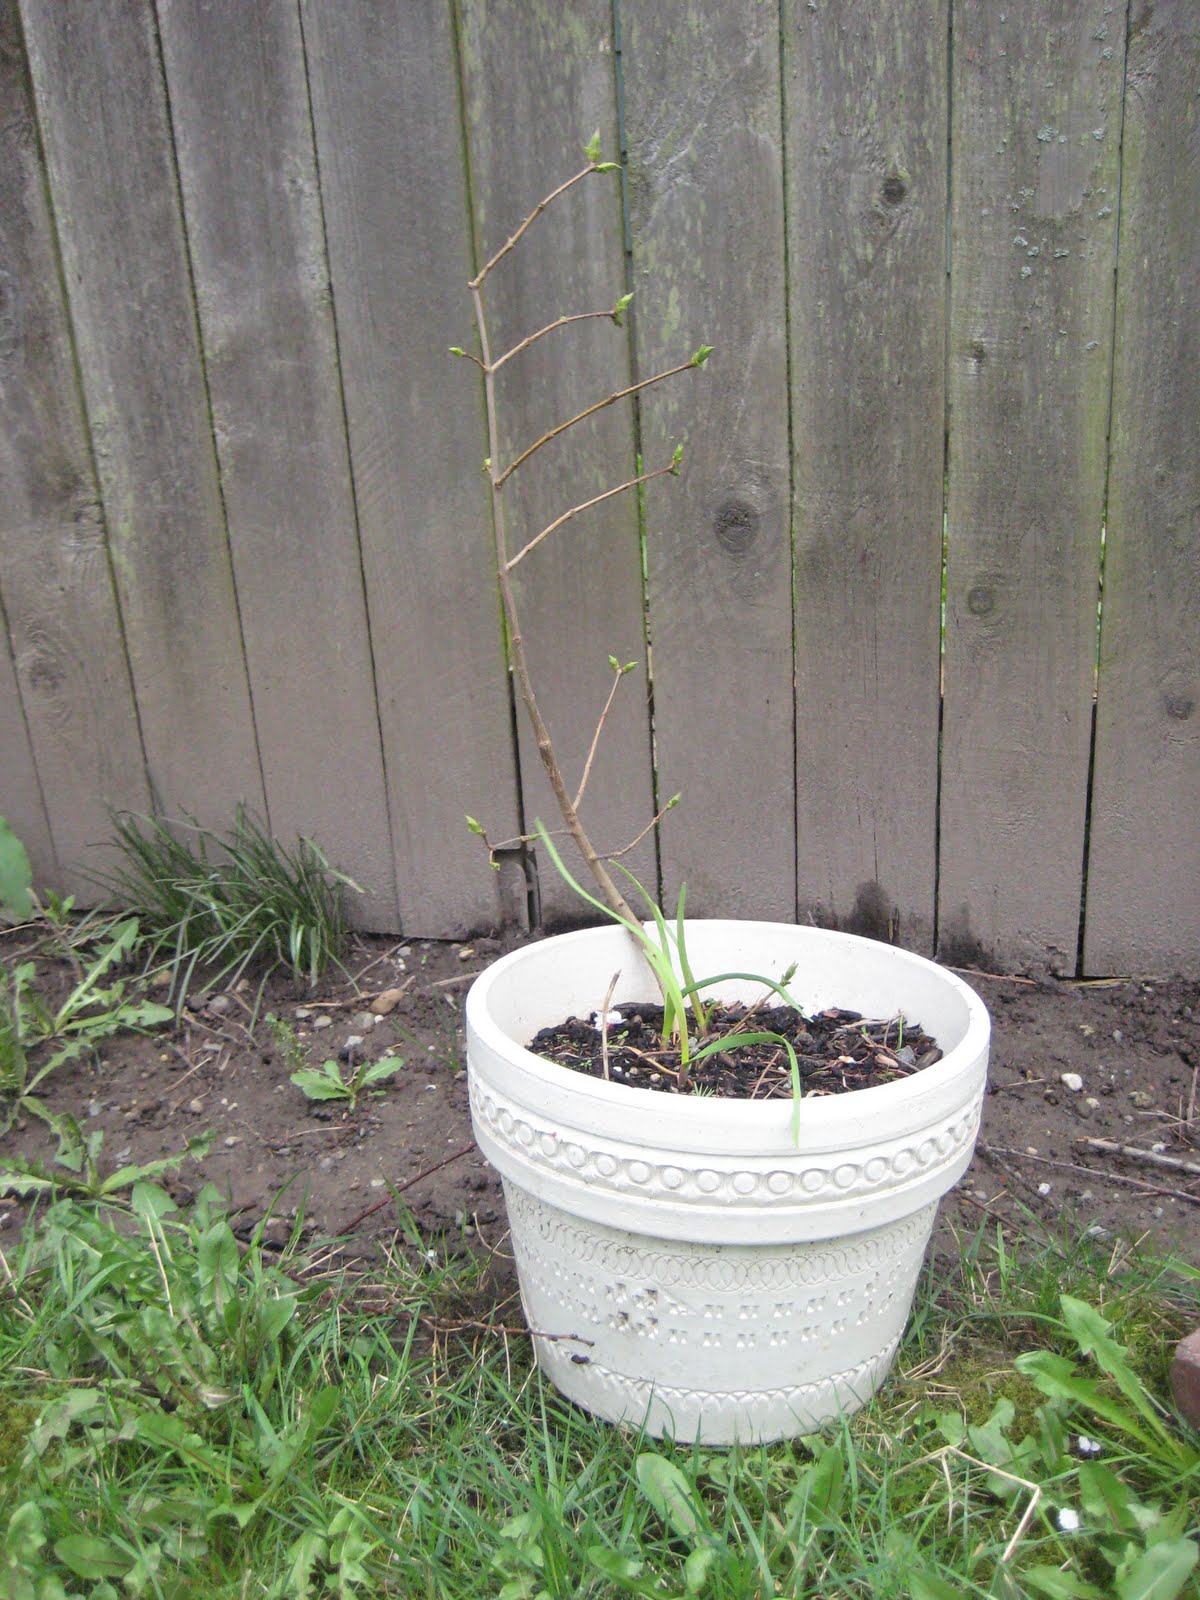
And this, which is going to be a tea plant:
 And this, which is going to be something totally lovely that I've forgotten.
 The one thing I managed to do right was plop some peony tubers in the ground last fall. So with a little luck, this ugly-duckling red sprout might turn into a gorgeous peony bush! Fingers crossed for this little guy!
 So that's the yard "before". As I've invited a buncha people over for an Easter picnic, I have precisely two weeks to whip it into shape! I'll keep you updated on my progress and let me know if there's anything you can think of that I could plant now that would be nice looking in time for Easter!
One of the reasons I agreed to move into my husband's house was the enormous yard. This house sits on a double lot which means by Seattle standards, we have a biiiig yard. When I moved in, the yard was extremely overgrown due to a long summer of getting married shenanigans and being away. Last October, we hired some guys to spend allll day hacking everything out of the yard and reclaiming the yard space. It was a big job and they did great. Unfortunately, if there's something that I am worse at than cooking, its gardening. The beds are now bare, ready for something great. Which...has yet to happen. So, daffodils are blooming and spring is going crazy everywhere but here:

Aaaaand, here:

And here:

The other side of the yard is even more shameful, due to the large quantities of car parts, tar paper and other hillbilly-like accoutrements. Beverly Hillbillies ain't got nothin' on this:

(Yes, that's a car dashboard on the left, and an old keg on the back porch.) And then there's this:

I used to call this The Midden. It's less overgrown with vines, but the car hood and the car door make a nice junkyard effect...
And then there's where the porch used to be. <Sigh> Now it looks like this:

A total junkheap. Oy. The yard looks like this from our bedroom:

Not very inviting, right? But hey, nowhere to go but up from here, right?? Right?!? Right!
We have made some small progress lately, mostly thanks to my new mother-in-law who bought plants, brought them over and popped them in the ground. (I know, I'm spoiled! In my defense, I tried to help plant them, but my only free day for planting was rained out.) So now we have this, which is going to be a lilac:

And this, which is going to be a tea plant:


Sunday, April 10, 2011
Spring has Sprung!
Y'all, spring has totally come to Seattle. Unless you've been living under a rock, hopefully you've been seeing some of the unreal gorgeousness that is happening outside. But just in case you have been a cave dweller...
How could you be unhappy if you get to see this every morning?
 These are the trees at Greenlake. I get to see them every morning on my way to work out. How gorgeous are they?

 OMG, I could stand here all day. But I'm pretty sure the runners would think that was weird...
It only makes me sad that this only happens for a couple weeks every year. Course, if we got year-round cherry blossoms they wouldn't be nearly as special. Other new treats are gorgeous daffodils. The ones are the lake are ravishing:
 And amazing in their quantity!
 Check out these mini volunteers from our own backyard!
 This one at the lake was particularly arresting, since we all know how much I love pink!


How could you be unhappy if you get to see this every morning?


Sooo gorgeous!

It only makes me sad that this only happens for a couple weeks every year. Course, if we got year-round cherry blossoms they wouldn't be nearly as special. Other new treats are gorgeous daffodils. The ones are the lake are ravishing:


And these guys cropping up next to a plastic bucket in our yard really ARE this bright. It's amazing.

Doesn't it make you feel lucky to be alive? I hope in the coming week you all have a view just like this:

To cheer you up from the winter doldrums. Happy spring everyone!
Friday, April 8, 2011
30 before 30 - #1!
2. Make jam.
4. Go for a picnic.
5. Go grocery shopping on my bike.
6. Finish my year-end photo albums.
7. Take Fred to Lost Lake.
8. Rearrange the backyard.
9. Eat at the Space Needle.
11. <edited for privacy.>
12. Have a really girly slumber party.
13. Play a round of mini-golf.
14. Get the craft room sorted and gorgeousified.
15. Go for a weekend in the San Juans.
16. Have an individual date with each NGS.
17. Go for a hike.
18. Plan and cook a week’s worth of dinners.
19. Go to Portland to see old friends.
20. Perfect a signature recipe (one slightly more nutritional than Bundt cake.)
21. Go to the drive-in movies.
22. Get a mani-pedi every month. (Done for Jan and Feb!)
24. Find the perfect shade of lipstick.
25. Host a big tea party in the back yard.
26. Make a quilt top.
27. Take six dance classes of any kind. (Two down. Love the Little Red Hen.)
28. Ride on a Ferris wheel.
29. Organize our finances and filing system.
30. Plan an awesome 30th birthday party.Y'all, number one has been kicked outta the club! I hosted a mah jongg night last night and it was super fun. In all fairness, I forgot to take a picture of the ladies playing mah jongg because I was too busy disjointedly describing the rules, trying to referee the snagging of tiles, and making sure that people said the right things. For those of you who don't know mah jongg, its basically a tile rummy game, with a lot of extra rules and traditions sprinkled in. My favorite part (besides my friends being totally hilarious) is the tactile and beautiful nature of the game itself. It comes in a super fun box like this:


Mah jongg has a lot of really arcane rules which were roughly followed at varying hilarious levels. Saying "hop toi" when you go around the corner of the wall shortly moved from a quiet "hop toi" to a gleeful "BOK CHOI!" Laying down a chow was shortly called out as "chow chow CHOW MEIN!" And the circles suit shall never be circles again, from here on out it is known as egg rolls. Whether or not this link between Chinese food and mah jongg was necessary or politically correct is dubious, but if it makes the rules easier to follow, I'm all for it.
We played two games of mah jongg and downgraded to Apples to Apples and Rack-O. The team playing AtoA:

Rack-o is a card game that has been enjoyed by my mother's family for fifty years, most of the enjoyment of which is that everyone says "nice rack!" at the end of the game. Here is Molly, showing off her winning rack.

Nice rack, man.
As always, the evening devolved until Paula captured a pic like this:

Subscribe to:
Comments (Atom)